Feature
Getting started with heylogin for companies

With heylogin, you can significantly improve IT security in your company. But what is the best way to start? In this article, in addition to the basics of using heylogin, we also explain how to set up and manage your organization.
The basics of using heylogin
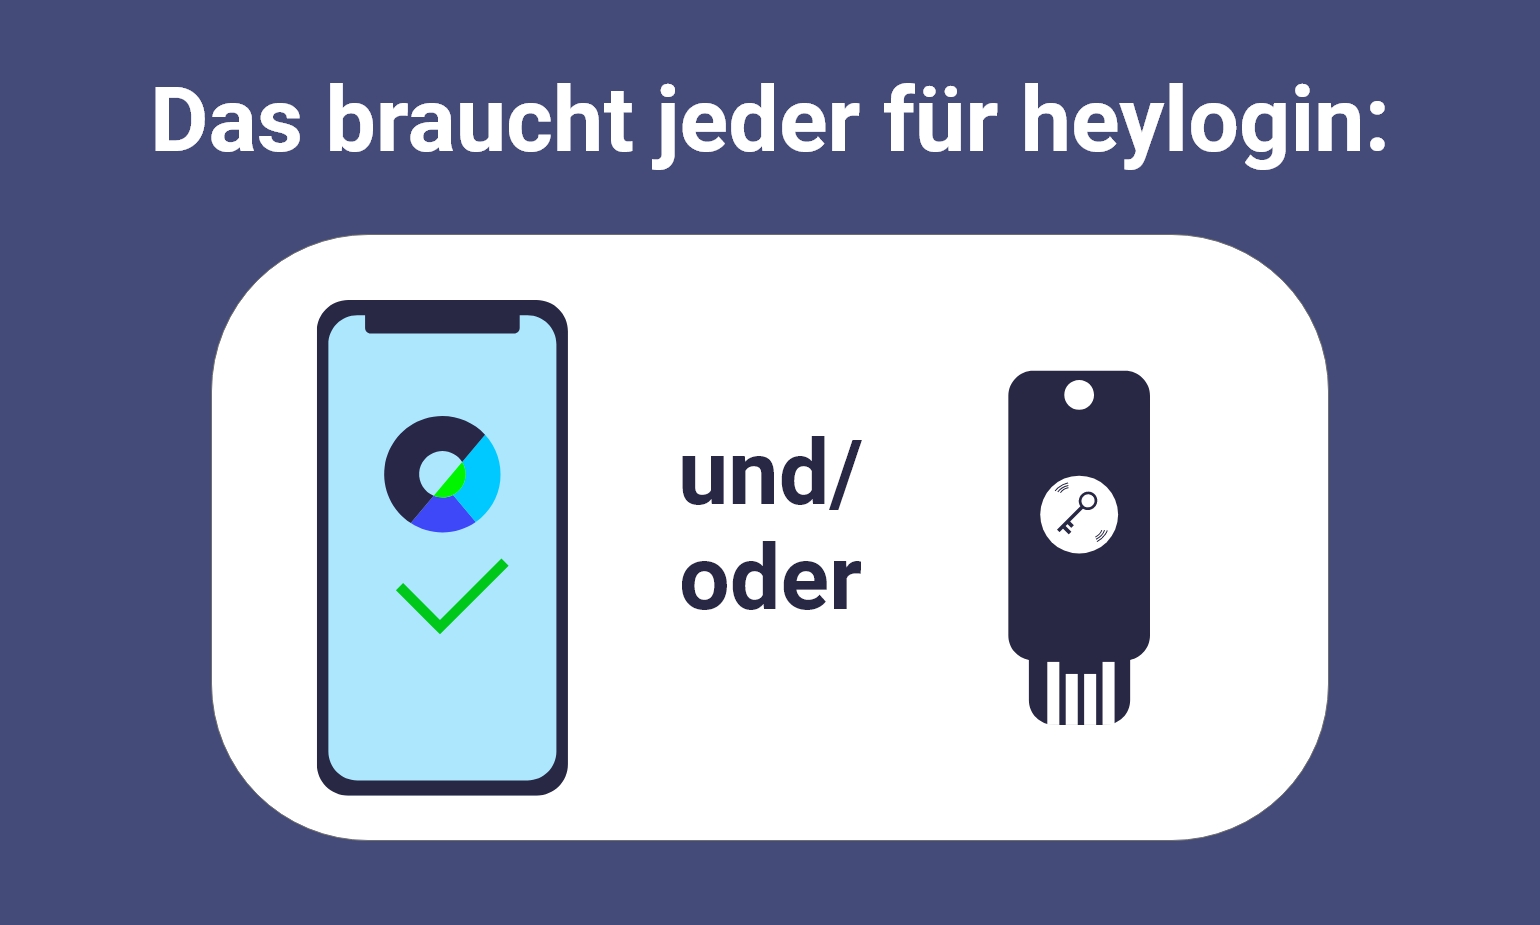
First things first: heylogin replaces the master password of other solutions with the users' smartphones. In a corporate context, this means that every user needs their own smartphone. It will soon also be possible to create a YubiKey As an alternative to using a smartphone, this rule still applies in principle.
Why only one smartphone per user: Other password managers use the human-generated master password to encrypt the data. With heylogin, a completely random secret is generated in the smartphone's security chip instead. However, as a result, the account is tied to the smartphone and can only be transferred to another mobile device through certain measures that users can take themselves or by an organization admin. You can find more information here in our Security white paper or our associated blog post.
Let's now move on to the organizational level in heylogin. The advantage of an organization is easy management of logins (the combination of username/email and password) and users for you as an admin. You can set access rights for logins, simply restore users if they lose their smartphone, and logins can be shared in teams by all members.
Create organization
Creating an organization is extremely easy. First, you need your own heylogin account. So install the mobile app on your smartphone and follow the instructions until you get to the web app.
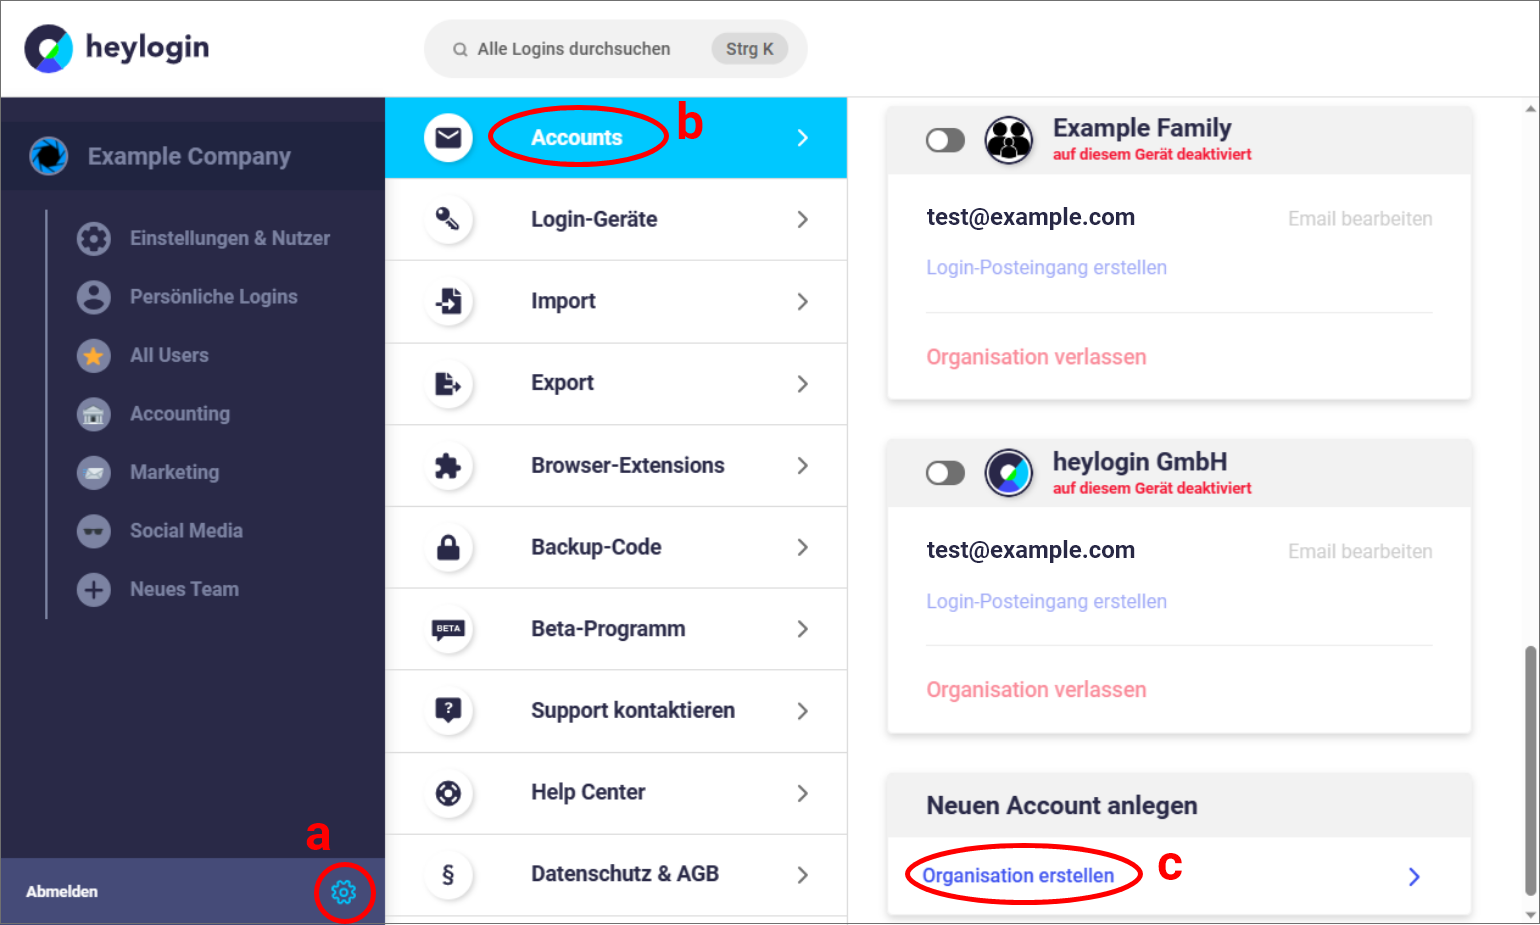
a.) Click the gear icon to open your account settings
b.) Go to “Accounts” (usually opens automatically)
c.) Click on “Create organization”
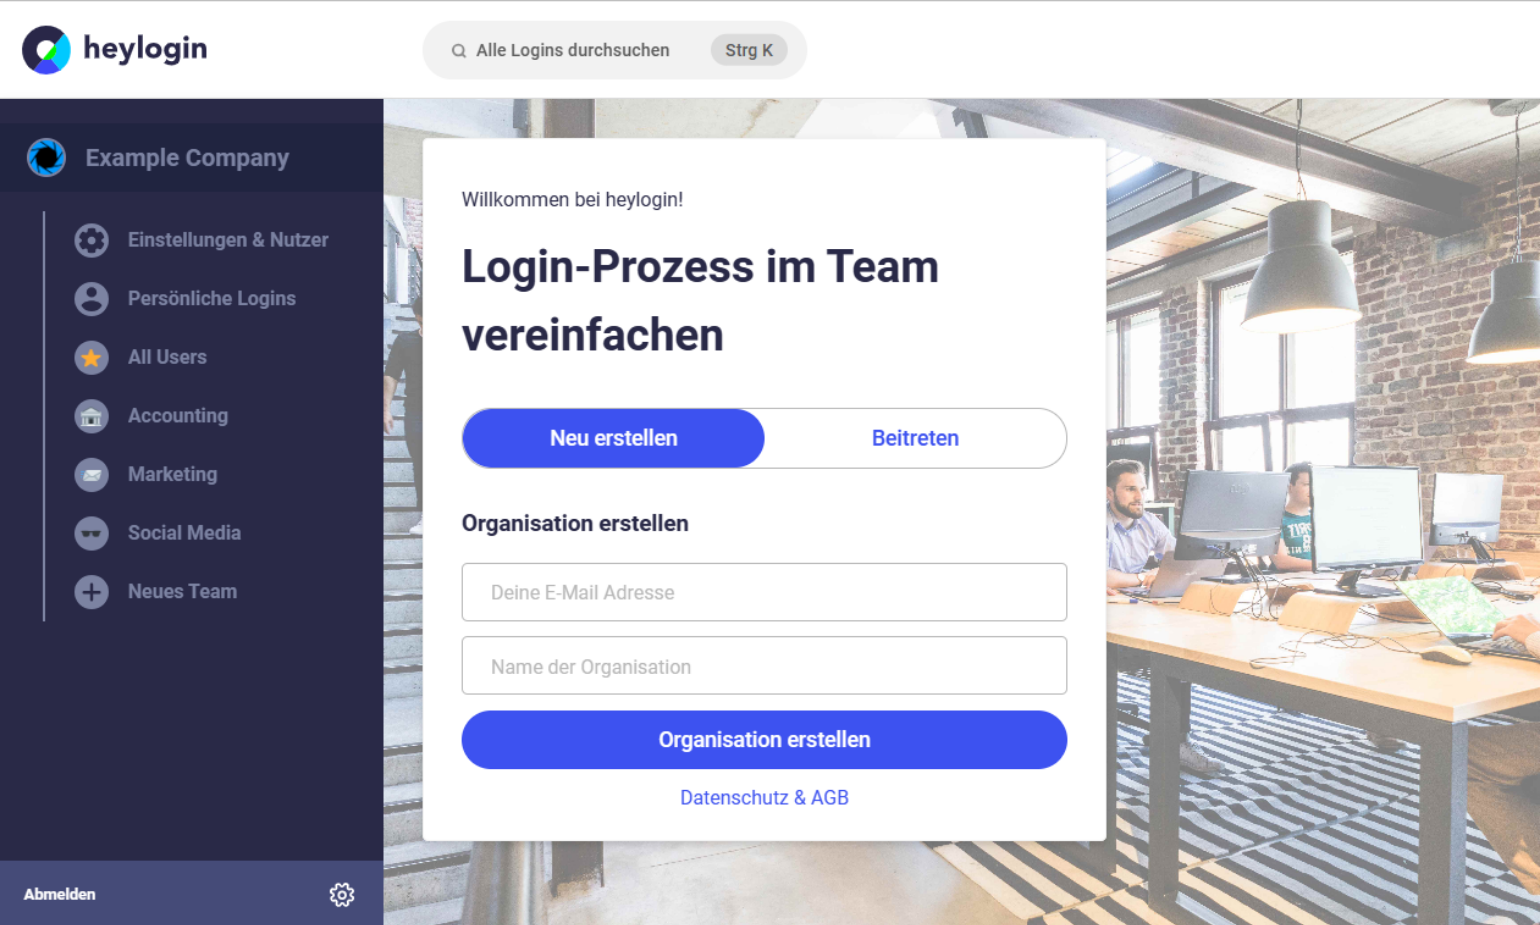
As the main admin, you can then enter your email address and the name of your organization and create the organization by clicking on the button.
Info: At any time during or after the free trial period has ended, you can either manually upgrade your plan via the organization settings or contact our sales department for an individually designed contract.
Set up organization
importation
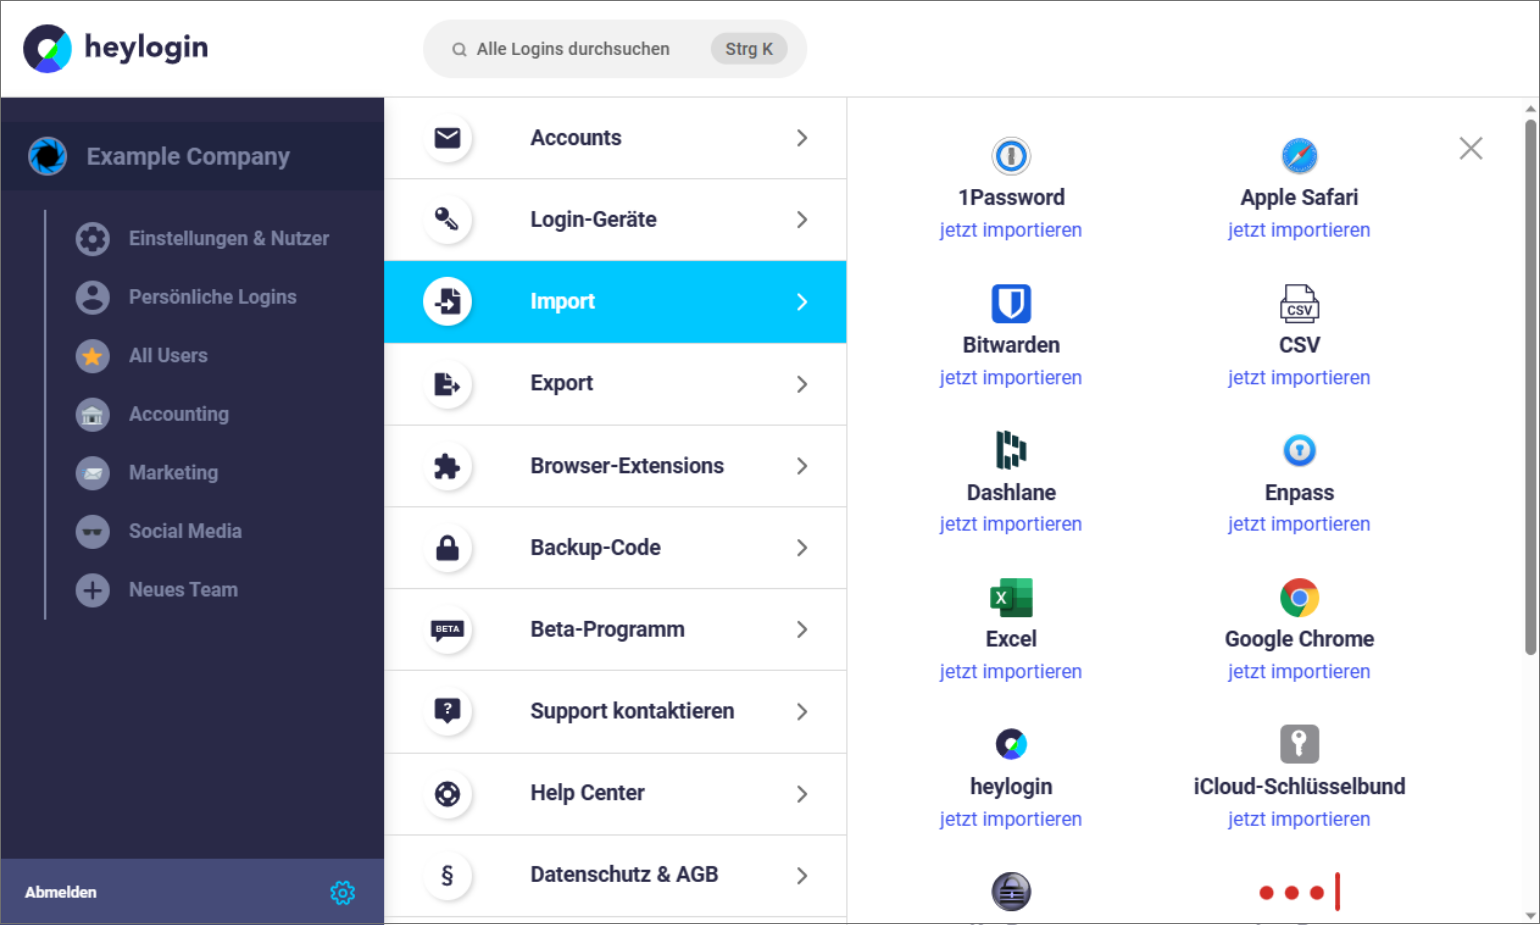
Now that your organization is created, we can start setting it up. First, you should import the logins from your previous solution. To do this, go to the import options in Settings and check if your old application is included. We not only support most common password managers, but also Excel and CSV files. If your solution is not included, check whether it is possible to export as CSV. Then you can simply use the CSV importer use.
tags
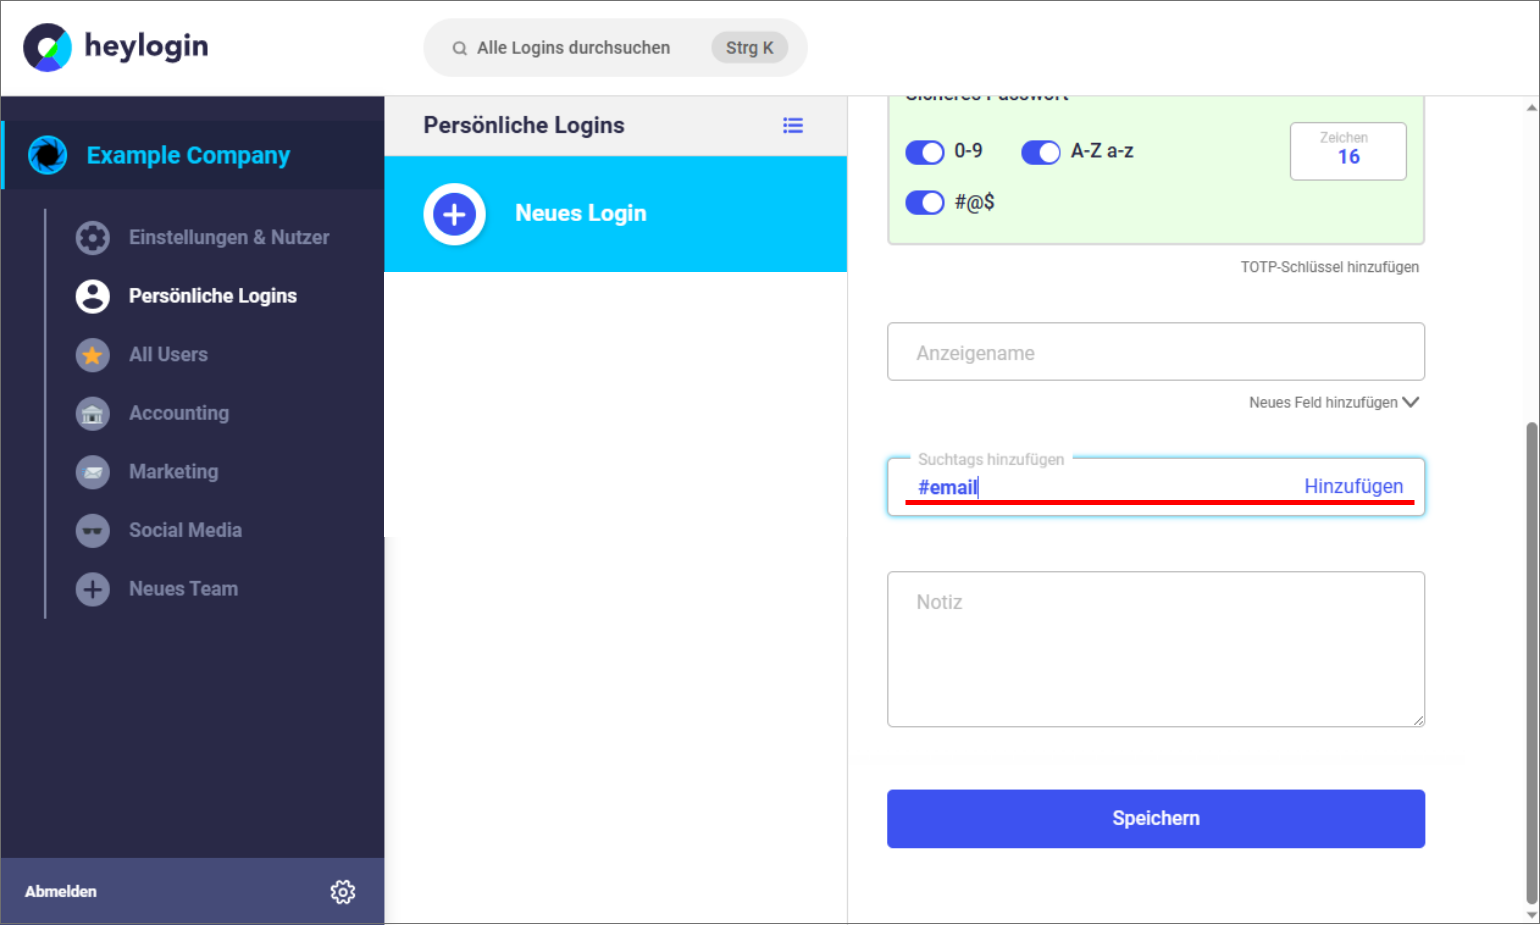
You can add one or more tags to your imported (or manually created) logins. If you are now looking for logins in a specific category, for example shared logins for shopping portals, you can enter the tag and have all logins with this tag listed. The search also works with multiple tags.
Create teams
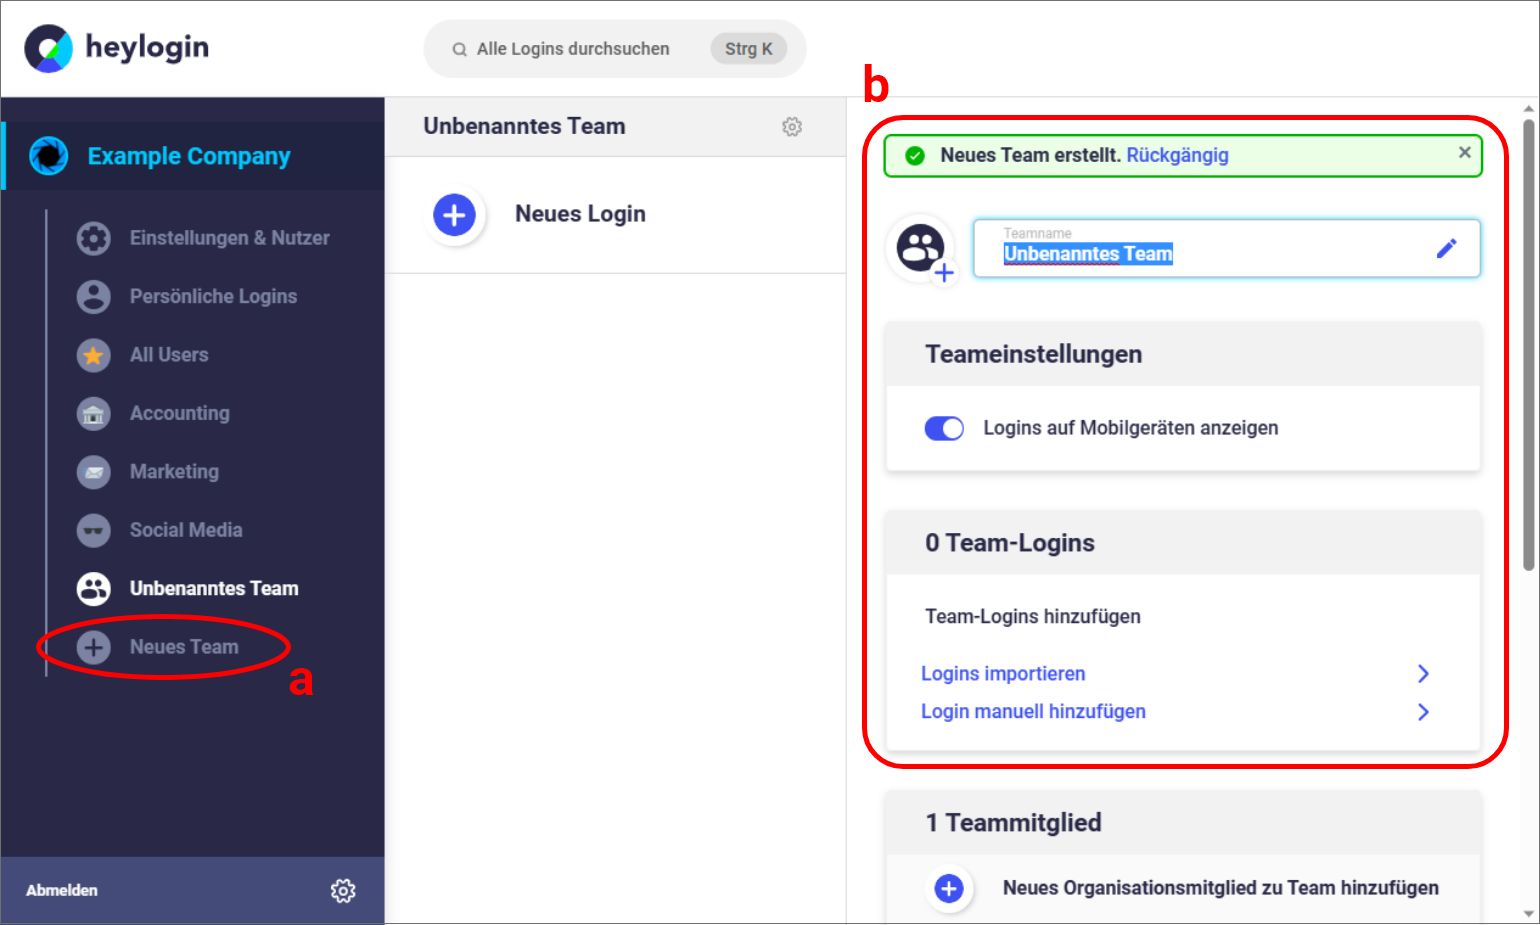
To better sort logins, you can create teams. This not only helps with the overview, but also allows you to share these logins with users from the respective departments later on.
a.) In the organization overview, click on “New Team” on the left.
b.) Now you can name the team and make further adjustments.
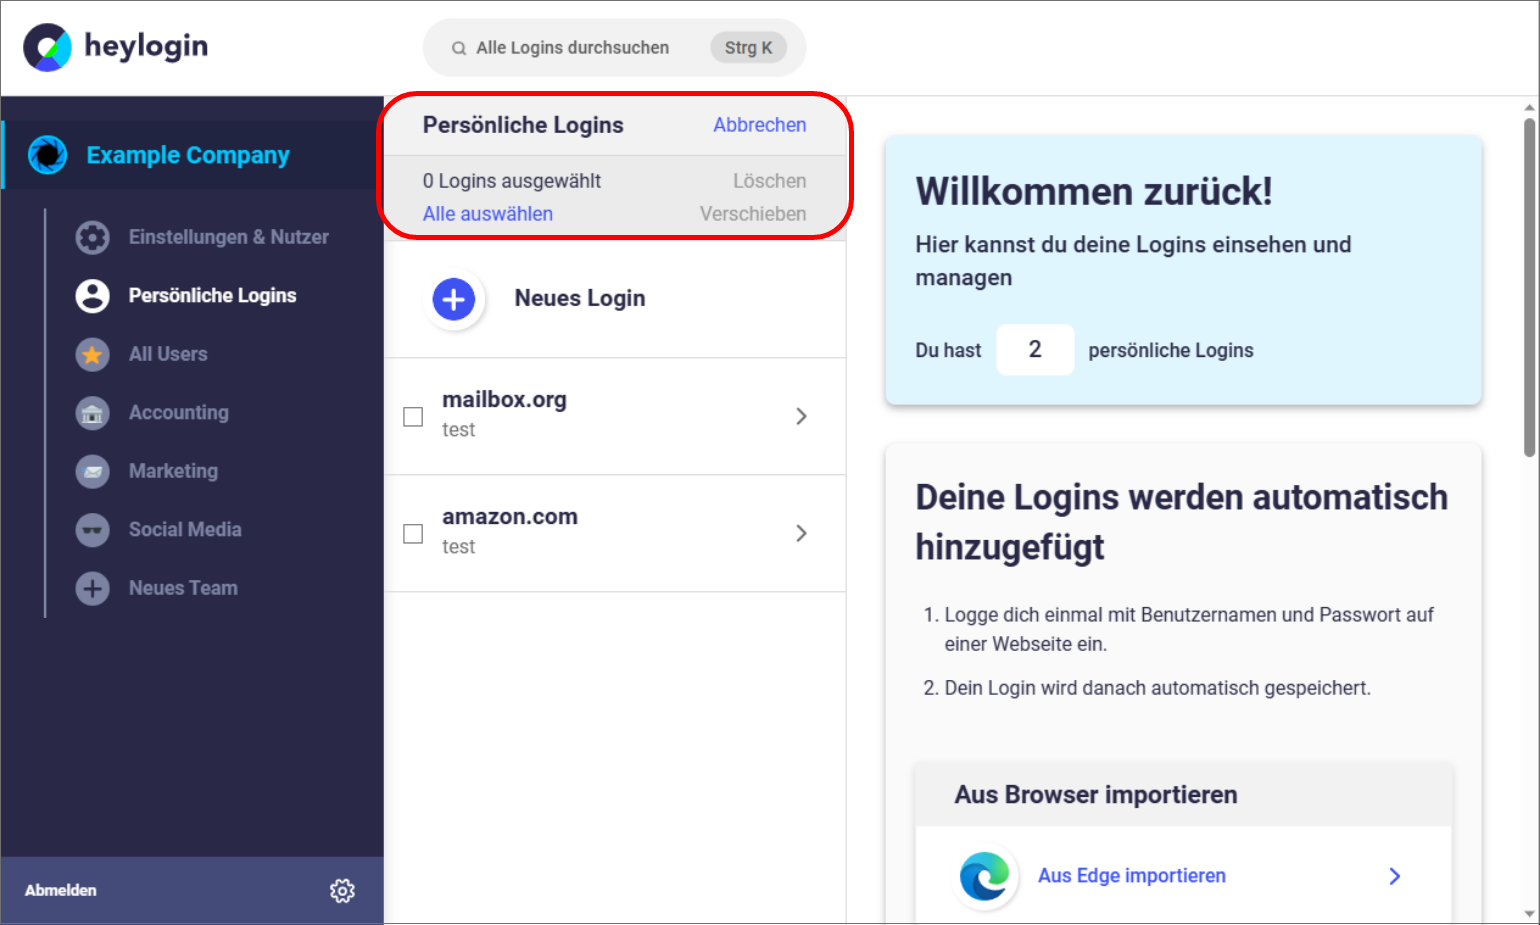
Tip: To quickly move many logins, you can use multiple selections. To do this, click on the menu icon in the team login overview or your personal logins to open the selection menu in the same area.
Invite users
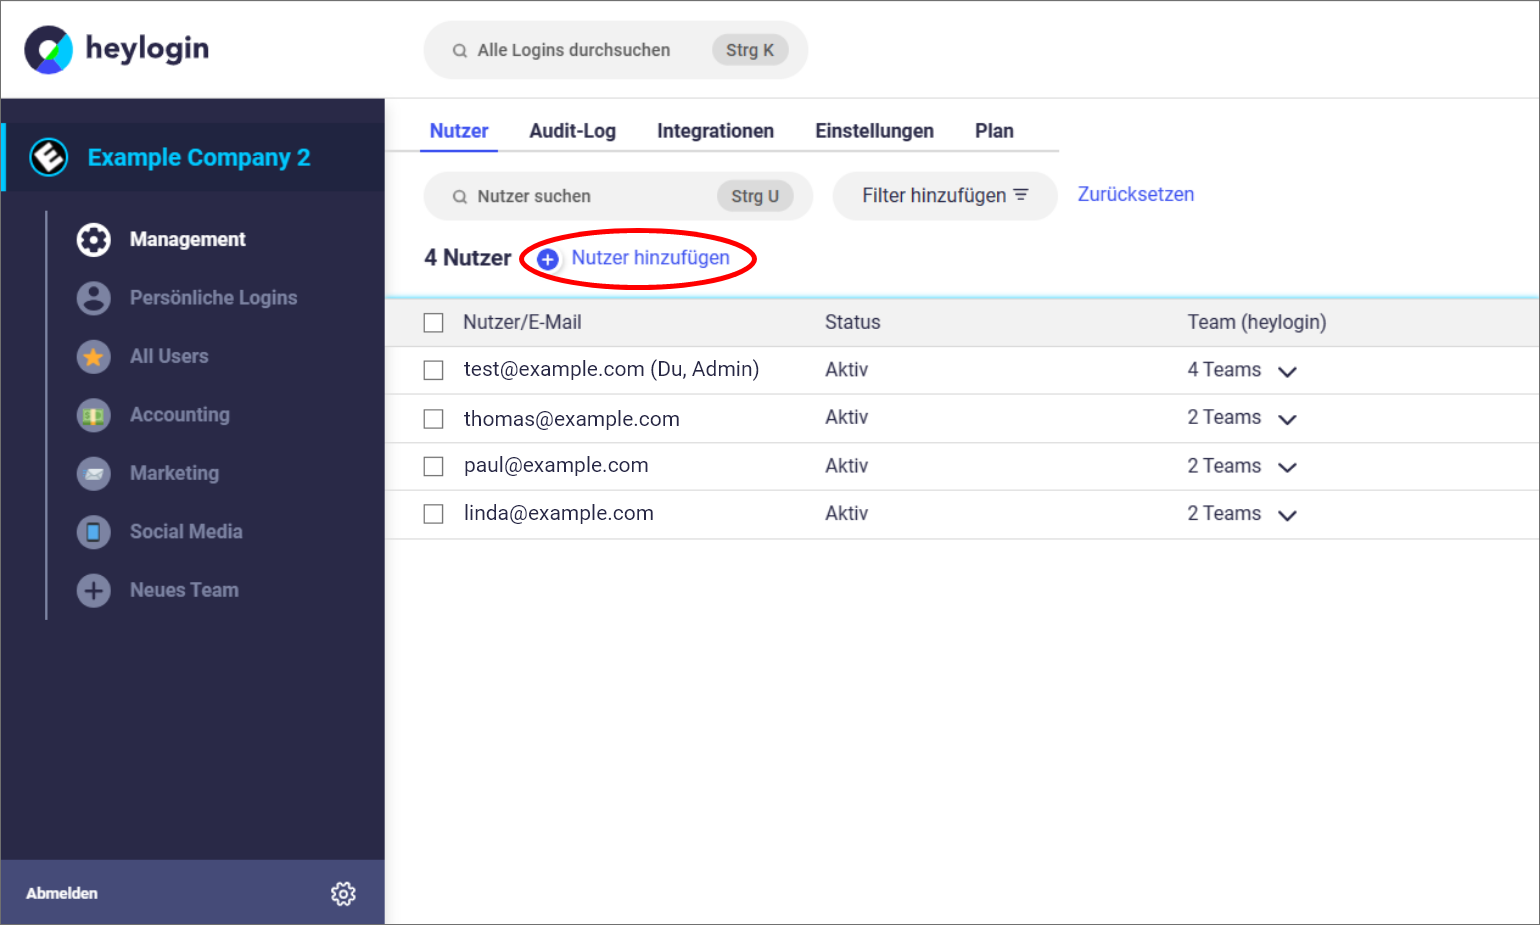
If you have distributed your logins to teams, you can add users to your organization. To do this, you can use the user options of the management tab (replaces Settings & Users”) of your organization to email individual or multiple users*Type inside at the same time and send invitation emails.
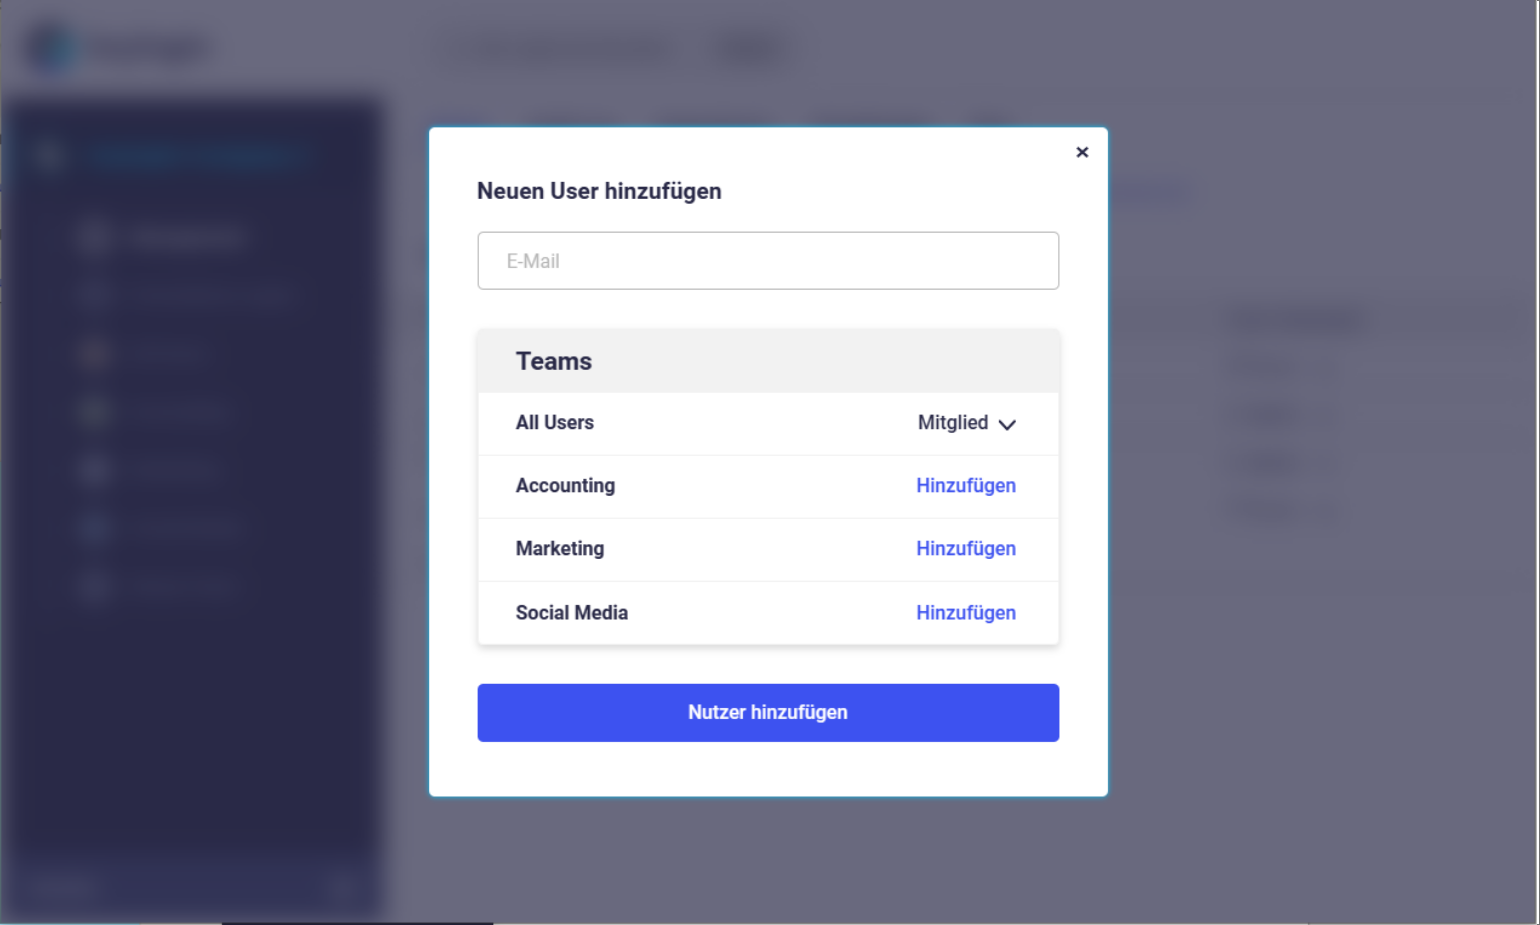
These users*Inside, you will be guided through the process of setting up the organizational account; a private profile does not have to be created during this process. If new users have been added, this menu can also be used to disconnect lost devices and connect new ones. Find out more about recovery here.
access rights

To ensure the security of your company logins, you can set access rights to logins individually for each team member. There are three settings:
- Team admin: can create teams and add new members and edit logins
- member: can edit logins
- Login only: Can only use logins and not see a password
Access rights can be set individually for each team for all users in the “Settings & Users” menu. Org admins also have access to all teams and can “invite” themselves.
Admin ToDos
For you as an org admin, there are still many security-relevant ToDos that you should consider: Securing access to the organization by the org admin, employee training and much more. Just have a look at our blog article best practices for org admins, All important information is compiled for you there.
Now you know everything you need to create and manage your heylogin organization. If you have any questions, please contact your heylogin representative. If you have any problems, simply write to our support team.